Kadhai Paneer Chronicles: From Tradition to Tempting Creations in 2023
Welcome to our comprehensive guide to the delectable world of Kadhai Paneer! If you’re a fan of Indian cuisine, you’re likely no stranger to the aromatic blend of spices, tender paneer, and vibrant bell peppers that make up this iconic dish. In this article, we’ll take you on a culinary journey to understand the history, preparation, and variations of Kadhai Paneer, ensuring that by the end, you’ll be a true master of this flavorful delight.
Unveiling the Origins and Significance
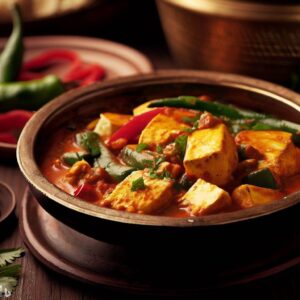
Kadhai Paneer traces its origins back to the heart of North India, where it was traditionally cooked in a ‘kadhai’ – a deep, circular, and thick-bottomed cooking utensil. The dish’s name pays homage to this cooking vessel, which imparts a unique charred flavor to the ingredients. Today, Kadhai Paneer has become a beloved favorite, not just in India, but across the globe, charming palates with its harmonious blend of textures and tastes.
The Art of Preparation of Kadhai Paneer: A Step-by-Step Guide
Ingredients You’ll Need:
Before embarking on your Kadhai Paneer journey, ensure you have the following ingredients ready:
- Paneer: The star of the show, cut into bite-sized cubes for easy cooking.
- Bell Peppers: Vibrant and colorful, they add crunch and flavor.
- Onions: Sliced finely to bring a touch of sweetness.
- Tomatoes: Ripened and diced, these add a tangy twist.
- Spices: An aromatic blend of cumin seeds, coriander, turmeric, and more.
- Green Chilies: For the perfect amount of heat.
- Ginger and Garlic: Crushed to release their essence.
- Oil: To sauté and enhance the flavors.
- Fresh Coriander: Chopped, for garnishing.
Step 1: Prepping the Ingredients
Begin by heating oil in your kadhai or a wide skillet. Add cumin seeds and let them sizzle. Follow up with finely chopped ginger, garlic, and green chilies. Sauté until the aroma envelops your kitchen.
Step 2: Sautéing the Onions and Tomatoes
Introduce the sliced onions to the fragrant mixture. Sauté them until they turn translucent. Next, add the diced tomatoes and allow them to cook down, releasing their juices and forming a rich base.
Step 3: Creating the Flavorsome Spice Blend
The magic takes place here. Add the turmeric, coriander, red chilli powder, and garam masala that you measured out carefully. As the spices fill the dish with their enticing flavours, observe how the colours blend.
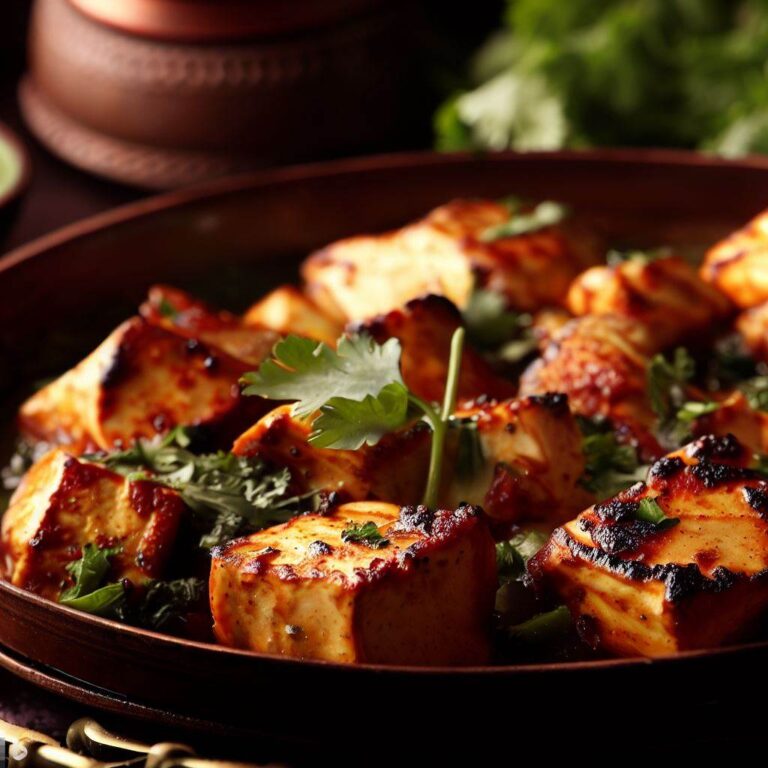
Step 4: Paneer and Bell Peppers Dance
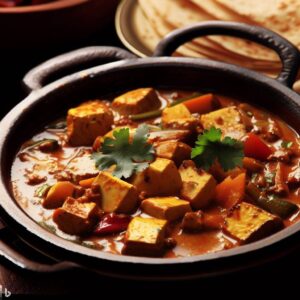
Gently place the paneer cubes and sliced bell peppers into the kadhai. Ensure each piece is coated with the aromatic masala. Let them cook on a medium flame, allowing the paneer to turn slightly golden while the peppers maintain their vibrant hues.
Step 5: The Finishing Touch
Sprinkle some fresh coriander on your Kadhai Paneer, and it’s good to eat. The combination of flavors and textures will surely please your taste buds.

Variations to Suit Every Palate
Kadhai Paneer offers room for culinary creativity. Here are some popular variations that you can explore:
- Creamy Kadhai Paneer: Incorporate cream and cashew paste for a rich and indulgent twist.
- Dry Kadhai Paneer: Cook the dish until the masalas cling to the paneer and bell peppers, creating a dry yet flavorful preparation.
- Spicy Kadhai Paneer: Intensify the heat by adding more green chilies or a dash of chili flakes.
Pairing and Serving Suggestions
Pair your Kadhai Paneer with steaming hot naan, buttery parathas, or fragrant jeera rice. A side of cooling raita or crisp salad can perfectly balance the dish’s spices.
Conclusion
In conclusion, Kadhai Paneer is more than just a dish; it’s a celebration of flavors, history, and culinary craftsmanship. Armed with the knowledge of its origins, preparation techniques, and variations, you’re equipped to embark on your own culinary adventure. So, don your apron, grab your kadhai, and let the aromatic symphony of Kadhai Paneer fill your kitchen and your heart.